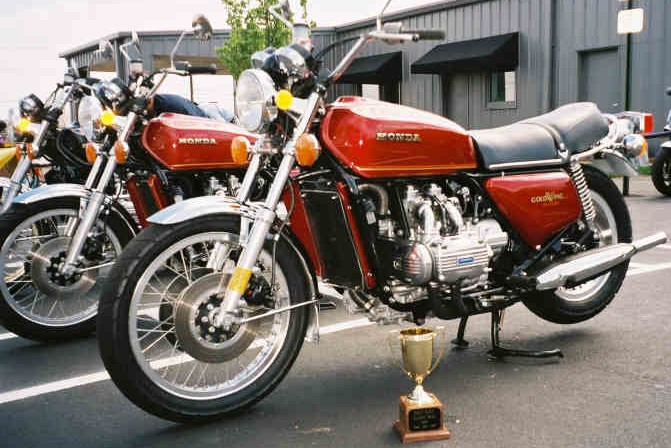
Here’s a list of specific recommendations I’d like to share with any new owner of an early Honda GL1000 (1975-1977). These are based on my many years of experience owning, riding, restoring and servicing these bikes. These address frequent questions I get and incorporate preventions for most of the common problems I’ve seen over the years.
- Protect yourself and your very valuable classic bike. Take a safety course! MSF offers excellent beginner and experienced rider courses throughout the country. I’m a big believer in these courses. Even though I’ve been riding for 35+ years, I’m still learning how to be a better rider. I just took the ERC course this past fall. See: https://www.msf-usa.org/
- Every rider should read David Hough’s excellent books: Proficient Motorcycling and More Proficient Motorcycling: Mastering the Ride. Needless to say, I don’t care to invest considerable energy on restoration efforts on a bike that is going to suffer damage at the hands of a careless rider. Understand and master the instruction on:
- Countersteering
- Braking
- Vision Skills
- Get out your owners manual and read it cover-to-cover. If you don’t have one, a nice reprint can be ordered from: https://www.helminc.com/helm/homepage.asp
- Get a workshop manual. There are three to choose from: the Official Honda Workshop Manual plus manuals from Clymer’s and Haynes. The Honda manual is best, but the other two are adequate for most purposes. The Clymer’s and Haynes books are available from many sources on the Net or from any motorcycle dealer. Get the Honda Manual from: https://www.helminc.com/helm/homepage.asp
- Make sure you have a complete factory toolset on board. If yours is missing, they are still available from Honda. These can handle 90% of roadside tool requirements.
- Change the timing belts if you don’t have verifiable proof regarding their age. My recommendation for changing timing belts is every 5 years or 25,000 miles…whichever comes first. This is a fairly easy procedure which is well-covered in the manuals. Please be aware that the GL1000 is an interference design engine. This means that broken belts or incorrectly installed new belts will cause pistons and valves to collide in a very catastrophic manner. So be very careful when installing new belts. Make sure all your marks line up exactly. Double check your work. Rotate the engine BY HAND through 2 complete engine revolutions. Recheck you marks. Don’t start the engine or operate the the starter until you are absolutely certain the belts are on correctly!
- Oil recommendations are inherently controversial. If you change your oil often (as you should) most modern oils are OK. However, in my own bikes, I often use Honda, Kawasaki, Suzuki or other brand of motorcycle-specific, conventional motor oil. The correct viscosity is 10W-40. Do NOT use automotive oil – friction modifiers added to improve gas mileage make it is too slippery and may cause problems with your wet clutch. I don’t recommend synthetic oil or synthetic blends because they are not necessary. Change your oil every 4 months or every 3000 miles whichever comes first. Yes, this might seem a bit overly-frequent. However, If you follow this regimen, you will never have an oil-related failure and your engine should be good for at least 250,000 miles.
- If you insist on using a non motorcycle-specific oil, a very good choice is Shell Rotella-T (15W-40). This is a so-called “universal oil” which is primarily marketed for diesel use. This oil has high pressure additives which are beneficial to the transmission gears which share the crankcase oil. It does not have any harmful friction modifiers. Note that not all diesel oils are classified as “universal oil.” Shell Rotella-T is available at most mass merchandisers (like Wal-Mart) at a very attractive price. I have used this oil for years with full satisfaction.
- Oil should be checked with the bike on the center stand. You may need a flashlight if you are inside your garage. There is a small window on the lower ride side of the engine for viewing the oil level. On some GL1000s, the viewing window incorporates a small wiper blade that you can turn with a small screwdriver to clear the window for better viewing. This is not usually necessary unless the bike was just shut off. Do not overfill the oil level.
- Total oil capacity is 3.7 quarts with filter change. My practice is to fill with 3 1/3 quarts of oil whenever I do an oil and filter change. This yields an oil level at about the mid-point between the “full” and “add” lines on the window. My experience is that this oil level reduces oil consumption (and start-up smoking) somewhat vs. running at the full line. Be aware the the oil level will settle a bit after the oil pump primes, then fills the oil galleys and filter canister on first start-up after the oil change. Re-check and adjust the oil level as necessary when the bike cools after the first run.
- Final Drive lube: 90/100W hypoid gear oil.
- Use a battery maintainer at all times when parked. I like Battery Tender products. Yuasa also makes a good battery maintainer. Note: these are not the same as “trickle” chargers. They have sophisticated logic to keep the battery fully charged over long periods without the risk of overcharging or boiling out the electrolyte. Use of a battery maintainer will greatly increase the performance and life of your battery.
- Ordinary conventional batteries are fine. I’ve had good experience with Yuasa as well as the private labeled versions available at WalMart, auto parts stores, etc. When your battery is 3 years old, buy a new one! Motorcycle batteries don’t have huge reserves of extra power. They can fail without warning. Replacing at 3 years will save you the usually inconvenient grief of a failed battery. Correct battery specification is: #Y50-N18L-A (12 volt, 20AH). Recently, I’ve had good luck with so-called “maintenance-free” batteries.
- The charging system on the GL1000 is just barely adequate. Don’t add high drain accessories. On my personal bikes, I add a provision for an electric vest and that’s it.
- Get familiar with the operation of the kill switch located on the right handlebar cluster. MSF Safety Courses recommend that you always shut down the engine with the kill switch, then shut off the ignition switch. This is a very wise practice … in case you ever need the kill switch in an emergency, you will know where it is.
- Starting Procedure:
- COLD– Have your helmet, jacket, gloves, etc. on and be fully ready to ride. Turn petcock on, engage neutral, clutch lever out, crack throttle, pull choke knob all the way out, then release throttle. Cracking the throttle is important – it takes the strain off your choke cable and choke linkage which helps insure you get full choke. Make sure the kill switch is “on” as well as the ignition switch then depress starter button. Spin starter for no more than 10 seconds at a time to avoid overheating the starter. When the engine starts, regulate the choke knob as necessary to prevent the engine from revving above 3000 rpms. As soon as engine is running smoothly on all 4 cylinders and will respond (a bit) to the throttle…move the choke to 1/2 out position. Then begin riding at once. Within a minute or 2 of riding, move the choke to full “in” position. Extended warm up while parked or choking while riding is not necessary or desirable. The bike will take 15-20 minutes of riding in cold weather to come up to full temperature. During the warm-up period, the curb idle will probably be too low, so you may have to “nurse” the throttle a bit during stops until the engine is fully warmed.
- WARM– (parked less than 3 or 4 hours). Turn petcock on, engage neutral, clutch lever out, crack throttle, NO CHOKE, make sure kill switch is “on,” ignition on, then depress starter button. Bike should fire up immediately and be ready to ride.
- The curb idle speed will vary with air temperature, barometric pressure, humidity, altitude and other factors. On a fully warmed engine, the ideal idle speed should be 1000-1100 rpms. You will have to make periodic adjustments on this throughout the year to maintain the proper idle speed. Never adjust the idle speed unless the engine is up to full operating temperature. If the idle speed is too low, you may foul plugs, if is too high, the bike will be lazy in returning to idle after you close the throttle and you will lose engine braking effect. My idle speed recommendation is slightly higher than the Honda recommendation. Most bikes appreciate my setting with a noticeably smoother idle.
- Always turn the fuel petcock to off when you shut off the bike…even if you are only going to stop for a few minutes. This habit will prevent any problems with flooding. Flooding is unlikely if your float valves are in good shape. But, you never know when they will fail. Flooding is fairly common in bikes of this vintage. It’s not only annoying, it can create a serious fire hazard. It can also cause extensive engine damage by washing the oil film off the cylinder walls. In extreme cases, flooding can result in bent connecting rods!
- Petcock operation:
- Turning the petcock lever to the horizontal position is OFF
- Turning the petcock lever so that the tip of the lever points DOWN is NORMAL RUN
- Turning the petcock lever so that the tip of the lever points UP is RESERVE
- Use Reserve Position often or not at all to avoid sediment problems.
- Use regular unleaded gasoline only. Premium fuel is not necessary or required. Don’t use octane boosters or lead replacement additives either. The GL1000 has hardened valve seats that are quite happy without lead.
- Use STABIL brand fuel stabilizer in your fuel. Most GL1000s owners are busy, travel a lot and live in a climate with a real winter. They don’t ride their bikes nearly as often as they should. For these reasons, I recommend that you run STABIL year round. This will help you avoid problems with varnish gumming up your carbs from lack of use. See my Tech Tip on“Hard Starting”
- Use Marvel Mystery Oil in your fuel. Follow the directions on the bottle for correct “recipe” which is 2 oz of MMO per 5 gallons of fuel. The will keep the internal, moving parts of you carbs lightly lubed. MMO is also very effective at retarding rust inside the fuel tank.
- Every spring, put some Chevron Techton Fuel System Cleaner in your tank. Mix according to the bottle directions. PJ1 Carb Cleaner is a motorcycle-specific product which is also good for this purpose. Once a year is often enough for these powerful cleaners. They can help with minor gum, varnish and fuel deposits which occur during short periods on non-use.
- Keep your fuel tank full when parked. There are two main benefits:
- The fuel displaces moisture-laden air thus preventing corrosion
A full tank will flow fuel to the carburetors without much aid from the fuel pump (after you open the petcock). When the tank is about 3/4 full or less, the fuel pump is necessary. - A full tank will make starting easier after short lay-up by refilling the evaporated fuel from the fuel bowls faster.
- The fuel displaces moisture-laden air thus preventing corrosion
- Ride your bike at least once a month if possible. Each time you do, ride at least 20 minutes to make sure the bike reaches full operating temperature. Starting the engine and shutting it down before reaching full operating temperature is a sure way to decrease the life of your headers and muffler. New headers and mufflers are next to impossible to replace. GL1000 headers / mufflers should be good for 30+ years of use if you take real good care of them.
- If you know the bike will be parked for more than a month, read this on “Hard Starting”
- If you fail to “pickle” your bike properly for storage, you will probably need to get familiar with this information.
- Always put the bike on the center stand when parking in your garage. This will reduce smoking at startup All early GoldWings do this. This is not a problem…just a quirk owing to the horizontal cylinders. You are parking in a garage I hope? It would be criminal to leave these bikes outdoors year round.
- When parking (other than in you garage), evaluate the terrain and decide what method would be best. The center stand should only be used on a level, smooth, hard surfaces like concrete or cured asphalt. If the parking space is not level, use the sidestand and try to park with the front wheel pointed uphill. Make sure the bike is in first gear and that all of the slack is out of the drivetrain before you extend the sidestand. In hot weather, carry a small piece of flat metal ( I use a small ash tray) to prevent the sidestand from sinking into soft asphalt. These tips will prevent most accidental parking lot tip-overs.
- Brake fluid should be changed every 2 years. I use and recommend CASTROL DOT 3 conventional brake fluid. This is very important in a lightly used bike.
- Very important – change anti-freeze every 2 years. Use 50/50 mix made with distilled water. You must use an antifreeze that is compatible for use in an aluminum engine that contains no phosphates or silicates. I recommended the coolant sold at Honda (or Toyota) car dealerships. It has to be mixed with distilled water. Honda motorcycle dealers sell an excellent coolant that is already pre-mixed with water…a bit pricey though. The Honda premixed coolant is blue/green.
- Fork fluid should be changed every 2 years. I use ordinary Dextron automatic transmission fluid (ATF) in the front forks. I’ve experimented with specialty fork fluids, but have not found them worth the bother. When merely draining and replacing fluid: put 5.8 – 6.1 oz in each fork tube (170 – 183 cc). Using “extra” fork fluid to “improve” dampening won’t help handling, but will prematurely blow out the fork seals.
- When riding, make an effort to keep the engine rpms at or above 3000 rpms at all times. The engine will lug along without much complaint at lower rpms, but this tends to cause fouled plugs.
- If you need to remove spark plugs for any reason, do this ONLY when the bike is at full operating temperature or is overnight cold. In between, you run the risk of stripping the spark plug threads. This is because of the differential expansion rates for the aluminum head and the steel threads on the plug.
- Installing / Re-installing plugs without a torque wrench:
- New plugs: Finger tight + 1/4 turn only
- Used plugs: Finger tight + 1/8 turn only
- Tire Pressure Values – This information is on a decal on the rear fender. Check tire pressures with a gauge before every ride. Visual inspection is nearly worthless. Motorcycle tires have very stiff sidewalls. Under-inflated tires are very dangerous to ride. A tire with only 5 pounds of air may appear fully inflated.
- Fuses: There are 5 fuses for the electrical components in a fuse box behind the left top-shelter door. The fuse box cover should contain 3 spare fuses. The bike uses 5A, 10A, and 15A glass-type fuses. Make sure you have spares on board.
- There is a master fuse (30A blade type) located near the right side of the battery in a small black holder. Suspect this fuse, if you completely lose all electrical power at once. On some models, the master fuse holder contains a spare master fuse. On other models, the spare master fuse is held onto the battery retention strap with a special holder. Make sure you have a spare master fuse on board.
- Coolant level is checked at the overflow reservoir which is located behind the right top shelter door. Be sure to use the approved coolant mixture for topping up.
- The emergency starting lever is stowed behind the right top shelter door. This will work if your starter fails. It’s not very effective if the engine is cold or you’ve run down the battery. To use, snap the lever into the socket covered by a black rubber plug on the left rear of the engine.
- Learn to use your kick-starter.
- If your GL1000 is a ’77 read this.
- If your neutral light stays on after you’ve washed your bike (or ridden in the rain), don’t worry. The neutral light will behave normally as soon as the exposed connection to the neutral switch dries out completely (at the black wire on the lower right side of the engine).
- If your fuel gauge and water temperature gauge both suddenly read very high values (and you’re not puking coolant) you probably have a failed 7V regulator. This step-down device (located behind the left side top shelter door) reduces the 12V nominal battery voltage to about 7V (when the engine is running). Both of these gauges are designed to run on a max of 7 volts. Get this problem fixed immediately otherwise you will be buying new gauges to replace your fried ones.
- You should know how to by-pass a failed Reserve Lighting Unit. This is a very clever device. It’s designed to compensate for a failed low beam headlight or taillight filament by switching to the high beam headlight or stop lamp filament (at reduced voltage). If the unit is working correctly and all your bulbs are OK, here’s how you will know everything is right:
- The red stop lamp indicator on the console will come on every time you apply either the front or rear brake. If you apply the brakes and the red light does not illuminate you either have:
- a burned out taillight /stop light bulb
- a bad indicator bulb
- a problem with the Reserve Lighting Unit
- The headlight indicator works in opposite fashion (it is the clear white indicator on the lower left side of the console). It stays off all the time, unless there is a problem with one of the 2 headlight filaments.
Also, it’s possible for the RLU to fail in such a way that you have no headlights or taillights at all! The Clymer manual has a nice diagram (shown below) which shows how to bypass the RLU using 3 short jumper wires (via the dotted lines as shown below). I recommend that you make up 3 short wires (with appropriate male and female connectors on each end) and put them in your glove box along with a sketch of the connections to effect the by-pass.

By the way, if you are interested in maintaining your bike’s collector value, I recommend that you keep this device in service. It’s a very neat device that was engineered to accommodate anticipated safety regs that never materialized. In my experience, failures are rare and it does provide a useful safety feature. Collectors always check to see that GL1000s have this device in place and that it is in operation.
- The red stop lamp indicator on the console will come on every time you apply either the front or rear brake. If you apply the brakes and the red light does not illuminate you either have:


Hi!
Being 5’9 I am on tippy toes at all stops. This is very dangerous for this80 year old guy with wifey on back! I bought bike boots but can’t shift wearing them.Am hoping for a fix here!
The bike is a ‘76-GL 1000.
Thanks,
Lee
Hey Lee,
There are a few options that may work here. From least to most involved. You can remove the seat cover and shave/shape the foam lower to fit your form better. This becomes easier if you freeze the foam first. You (or a machine shop) can cut and extend the shift lever to give more clearance for your boots. Lastly and most involved is lowering the suspension with shorter components. Feel free to give us a call or chat with customer service, thanks for asking!
I lowered the front forks 1″ and bought 11″ rear shocks on eBay for $50. Bike rides as good as before (no bottoming out either) and allows me to plant feet on ground – and the lowered bike just looks better to me as well.
So I have started my 1979 gl1000 in a month. I just started it up then while I had it idling for a while coolant started to overflow the reservoir and the temp gauge went to zero. I’m thinking thermostat? But would that make the temp gauge drop as well?
79 goldwing here. I have a hard time finding neutral on the motorcycle. Shifts just fine up and down. I seem to have an easier time finding it when I am coasting to a stop. at a stop light it is very difficult to find. I seem to pass right by it every time. I have been running non synthetic 10w40 and the oil is almost new. Also has a heel toe shifter and floorboards. Any ideas or suggestions?
The first approach would be to confirm correct clutch adjustment. If clutch is not fully disengaged it will not allow transmission shafts to freewheel causing difficulty finding neutral. If clutch adjust is properly adjusted, you may want to inspect the clutch itself. You may have sticking fiber plates or possibility of wear grooves on fingers of clutch boss not allowing plates to expand as needed when pressure plate is engaged.
Do I need to pull the engine to access the clutch?
No. Start by reading this material: http://www.randakksblog.com/clutch-reassembly-trick/
So my new cable broke while riding. I discovered that the lever arm that actuates the clutch seems jammed. I’m going to have to pull it apart. But beforehand I heard some clacking that came from the clutch when in neutral and the clutch lever at rest. When pulling the lever in it went away. I tried to adjust that set screw and nut at the actuation arm and it just didnt feel right. The manual said feel for resistance then back off 3/4 turn and lock down. But it seemed to have been a more abrupt stop then gradual resistance.. any ideas?
Most likely, you need a new clutch eccentric.
I have a ‘76 wing that I’ve been retiring, it runs well but every time I shift into first gear, it fails to engage or pops out into neutral? First just doesn’t seem to be there when the clutch is released or if down shifting into first, it acts like it’s in neutral. Is this a transmission problem (gasp) or a clutch problem? Thanks!
If clutch adjustment is correct, that symptom often points to: worn “dogs,” bent shifter forks or some other internal transmission issue.
But sometimes, it’s just operator error. If you don’t move the shift lever ALL THE WAY DOWN, you will not get full engagement.
I’m considering buying a vintage Goldwing. I’m wondering if there is any advantage to buying a GL1000 over a GL1100 or the other way around?
Bryan in North Carolina
That is a personal preference. The GL1100 will have more power but both bikes are very similar and have a very similar ride. We do sell parts for both so its really which you would prefer and what you are wanting to do with it.
Thank you.
Why did you quit using Rotella oil and switch to motorcycle specific oil?
I didn’t.
See: http://www.randakksblog.com/another-reason-to-change-your-oil/
Gday there, I’ve just recently taken ownership of a 75 Gl1000
Have discovered the fuel pump has been bypassed and an electric pump has been installed, is this the way to go or should I return it to original? This pump has a small red and red/black wires which I’m unsure of where they are meant to connect to , so any advice would be welcome
Your recommendations are super for the Gl novice which I am and will definitely utilise them on this restoration
Thanks for your knowledge
Many electric fuel pump conversions have been made successfully on these bike. In fact, for many years – Randakk’s offered such a kit. It was discontinued due to supplier problems. Many of still on the road.
Electric fuel pumps solve some hard starting issues, but they are not very tolerant of suspended rust in fuel from neglected fuel tanks. The OEM fuel pump is always a good option.
Hard to say what you have without a photo. You can send a picture with your question to: customerservice@randakks.com
In the text above you say the normal running position on the fuel petcock is down. However, on my 77′ the little stamped words on the petcock definitely says ON in the up position and RES in the down position. So I’ve been running in the up position. Did some of them come with that reversed ?
OK forget this one. I realized it says ON on top but the pointer on the lever actually means the position is down.
Correct.
Greetings.
This all started with a simple search, for a simple project bike… I just wanted an old beater to fix up and ride. HA!
I’ve always liked them, so I put the word out amongst friends of what I was looking for, and then suddenly came into a windfall of GLs!
Two full ’76s.
Two more lightly picked at for parts, ’75 and ’78, engines both fully intact.
’89 and ’90, 1500 engines with VERY low miles, but no carbs.
And it looks like I may be getting another full ’76 and ’78!
All for free, or next to nothing!
Whew…
I’m fairly mechanically inclined (but it’s been awhile), have been looking for EXACTLY this kind of project as I re-organize and clean my metal shop and tools, have the time (but maybe not the full budget… …yet)…
…and I’m suddenly VERY overwhelmed!!
My excitement has turned to terror! HAHA!
I want to rebuild as many of these engines back to glory as possible. Not fully restored bikes (these are in pretty rough cosmetic shape, and missing some stuff, and I don’t want to piss off any traditionalist/restorationsists), but definitely back on the rode, and strong again! Even to the point of possibly getting one of these 1500s into a custom trike.
So, you see where I’m going with this, I think.
I’M ALREADY HOOKED ON GOLDWINGS!!! LOVE ‘EM!! HAHAHA!!
My question is:
Do you have any suggestions on how one might even begin to organize such a task?!!
Go after one bike at a time?…
All at once, mixing and matching parts to make the best of all the bikes?…
Scrap the entire cockamamy idea, sell everything for parts, and buy a bus pass?…
I’m suddenly very confused by the overwhelming options, and would really just like some opinions and advice from some pros, and fans of this awesome machine.
If it were you who just had a “lotto” of a half dozen fairly decent “barn finds”, a slim budget, the space, the shop, the tools, all the time in the world, a hankering for a home hobby bike business, and a cult like love of the Honda GL, what would YOU do to organize, assess, and tackle these potential projects?
Thanks!
Best advice: Join the NGW Club Forum and ask this question there. You will get many good helpful suggestions I’m sure.
see: https://ngwclub.com/forum/
suddenly at a stop light the rmps goes down and the engine stop so I have to start it again what could be the issue?
These are the usual things to check:
1. Set curb idle at 1000-1100rpms with fully warm engine and an accurate shop tachometer. The tach on the bike is not accurate or reliable enough to trust!
2. Poor synchronization
3. Dirty air filter
4. Contaminated fuel
5. Clogged idle jets
thank you so much I went to my mechanic and the Carbs Sync was poor ,each carb sync was all over the place.I get it fix and runs smooth than ever now.Thanks a lot
Thanks for the good report.
This the most comprehensive and understandable info I could get on my 77 gl1000. I bought it as a starter bike because my partner wanted me to learn to ride before I rode his 1800. He was going to help me get her back in shape but left me. So I’m going to do it myself, starting with the oil. I appreciate all the information, being a novice I could actually understand most of everything.
I have a 1978 GL1000 runs good but back fires and makes a popping sounds at times?
Most likely a defective air cut-off valve, vacuum leak or exhaust leak..
Hi Randall,
I have a ’77 GL1000 with a ’78 engine. The neutral light is staying on, it is slightly brighter when it is in the neutral position but gets a little dimmer when in gear, but stays on. I can’t figure it out and can only find your mention of “neutral light stays on” after washing, until it dries off. This is not the problem. Any suggestions?
Thanks,
Dan
Dan:
Most likely you need a new neutral switch. That procedure is well-covered in the OEM WorkShop manual. There are a few important, non-obvious “tricks” involved in the replacement.
I have a gl1000 (’75) and I live at 7000 feet (flagstaff,Az). I am just completing the carb overhaul as per the DVD, and I was wondering if you had any recommendations for high altitude? Thanks!
So long as you have the OEM air filter (not aftermarket) and stock exhaust …you should be fine at 7,000 feet. It is VERY IMPORTANT at higher elevations to have a very clean air filter! Also, check to make sure that the choke mechanism is fully operational so that it is completely open when not in use.
The Owner’s Manual has high altitude recommendation which is merely to adjust the idle mixture screws “IN” from the normal base setting. I would try 1 turn out from gently seated in your case. Good luck!
Will do. I have a sort of strange bike. At different occasions, two broken gw were given to me “if you can fix it, you can have it”. I put the ’75 engine in the ’78 frame. I have been enjoying the riding for three years now. I have been systematically replacing all the rubber in it. I named it ” Franky”- Frankenstein. Ha, ha. Thanks!
Sounds like some interesting projects there!
i have an 83 & the running lights have gone out recently. does anyone have any ideas on what to check? thank you
Start by checking the fuses.
You’ll get more feedback by posting your question here:
http://www.ngwclub.com/forum/
I have an exhaust leak between both headers and the main exhaust on my 76 GL1000. Where do I get the sleeve my maintenance manual shows?
Any Honda dealer can provide those items.
You can research parts at many online resources including my favorite:
MR Cycle’s online parts search tool: http://www.mrcycles.com/fiche_select.asp?vcc=Motorcycles&mfg=Honda#SDOWN