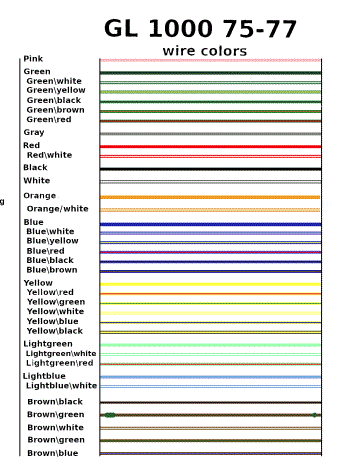
Thanks to our generous customer, John Verburg, we have this stock wiring diagram for the 1975-1977 GL1000 models, in a downloadable PDF.
Thanks to our generous customer, John Verburg, we have this stock wiring diagram for the 1975-1977 GL1000 models, in a downloadable PDF.
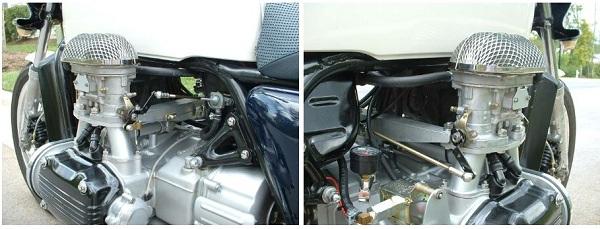
As installed and tested on RC003
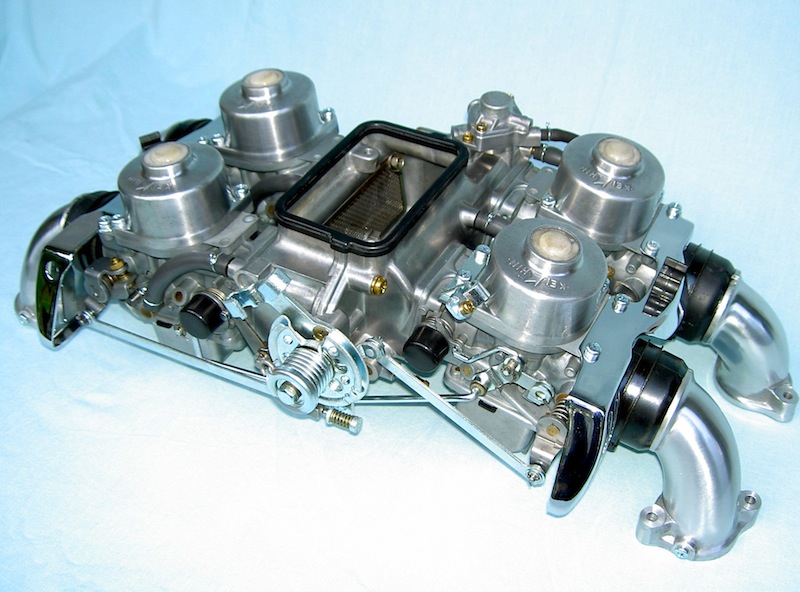
Continue reading “GEN III Dual Weber 40 Intake Manifold Set (Specifications)”
Different sprocket sizes – larger or smaller – what is the impact on performance?
Final drive ratio.
Divide the rear sprocket tooth count by the front tooth count and you have the final drive ratio. For example: 35 / 15 = 2.33:1
If you want to change your gearing, you can calculate the impact of the change before you purchase the new sprockets.
For example: your bike cruises at 60 mph / 4,000 rpm and has a final drive ratio of 2.33:1 – if you want more acceleration, changing a 35 tooth sprocket for a 37 tooth sprocket and leaving 15 tooth on the front changes the ratio to 2.47:1 (37 / 15 = 2.47:1). Divide your cruising RPM by 2.33 and multiply by 2.47. Using the example from above, 4,000 rpm becomes 4,240 rpm at 60 mph. You’ll get more acceleration, but will sacrifice
Changing sprocket diameter can present problems – sprocket clearance on the front limits how big you can go, and you want to avoid going too small as the tight turn wears the chain prematurely. Additionally, you can run into problems with the chain slapping the swingarm if you go too small on front and/or rear. This is something you cannot always see when the bike is static, the combination of swing arm movement over the bumps, and acceleration or deceleration cause the chain to tag the top OR bottom of the swingarm.
Changing sprocket sizes may effect chain length. As roughly 1/2 of each sprocket has chain touching it, each tooth added to stock sizes will require approximately 1/2 link of additional chain. Increasing total teeth by one or two teeth can usually be accommodated by moving the rear axle forward slightly and keeping the stock chain length – but if you start changing sprocket sizes more than one or two teeth, you will need to increase chain length. Going up four teeth will require a chain 2 links longer.
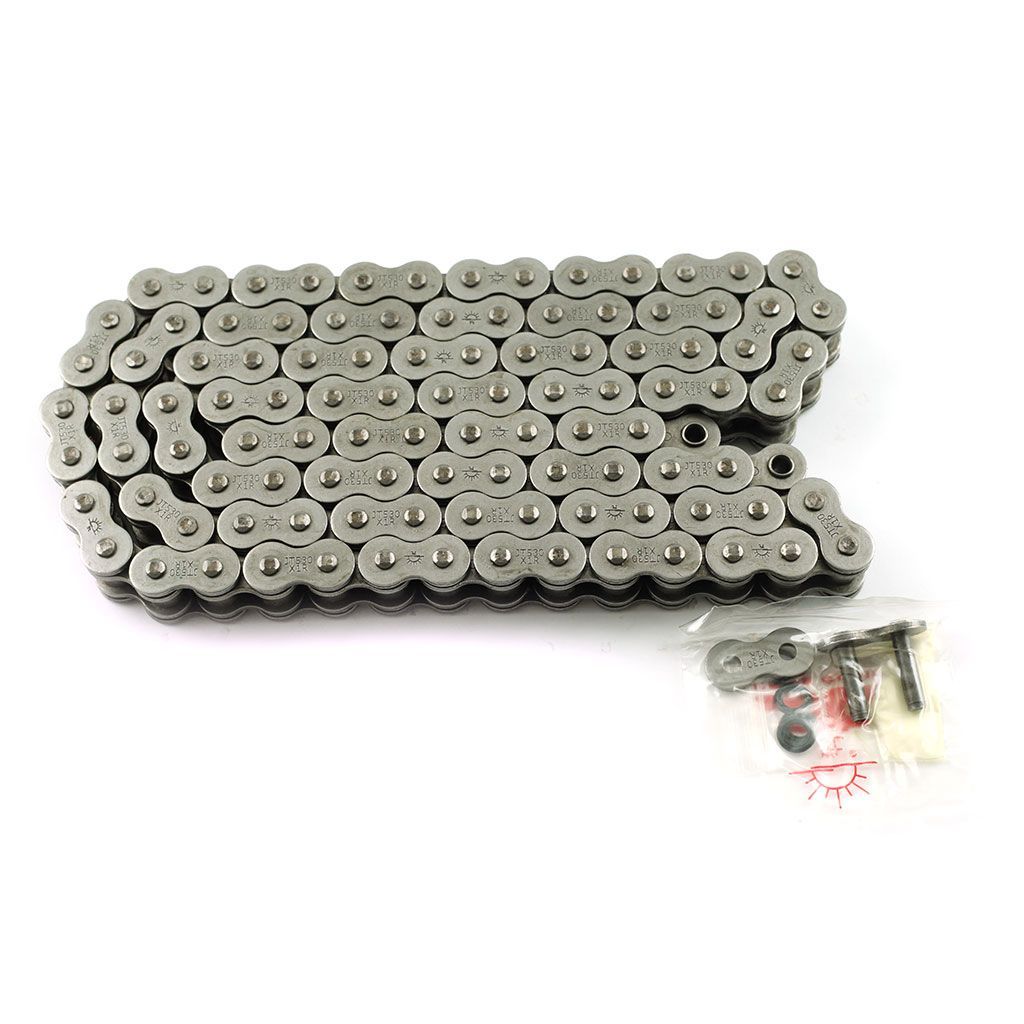
630, 530, 525 & 520 chain?
O-Ring, X-Ring, non-O-Ring?
What does it all mean?
Chain comes in a variety of pitches and widths. It is crucial to select the correct chain and sprockets for your bike.
The first number of the chain type designates the chain pitch and represents the distance between each pin in eighths (1/8) of an inch.
630 chain is 3/4″ pitch (or think of it as 6/8″), 530 chain is 5/8″ pitch, and so on – so if you are not sure what size chain you have on your bike, just measure the pin-to-pin distance.
The second two numbers show the width of the roller section of the chain in eighths of an inch – with an assumed decimal point between the numbers. 630 chain is 3/8″ wide and 525 chain is 5/16″ wide (2.5 eighths).
520 = 5/8-inch pitch, 1/4 inch wide
525 = 5/8-inch pitch, 5/16 inch wide
530 = 5/8-inch pitch, 3/8 inch wide
630 = 3/4-inch pitch, 3/8 inch wide
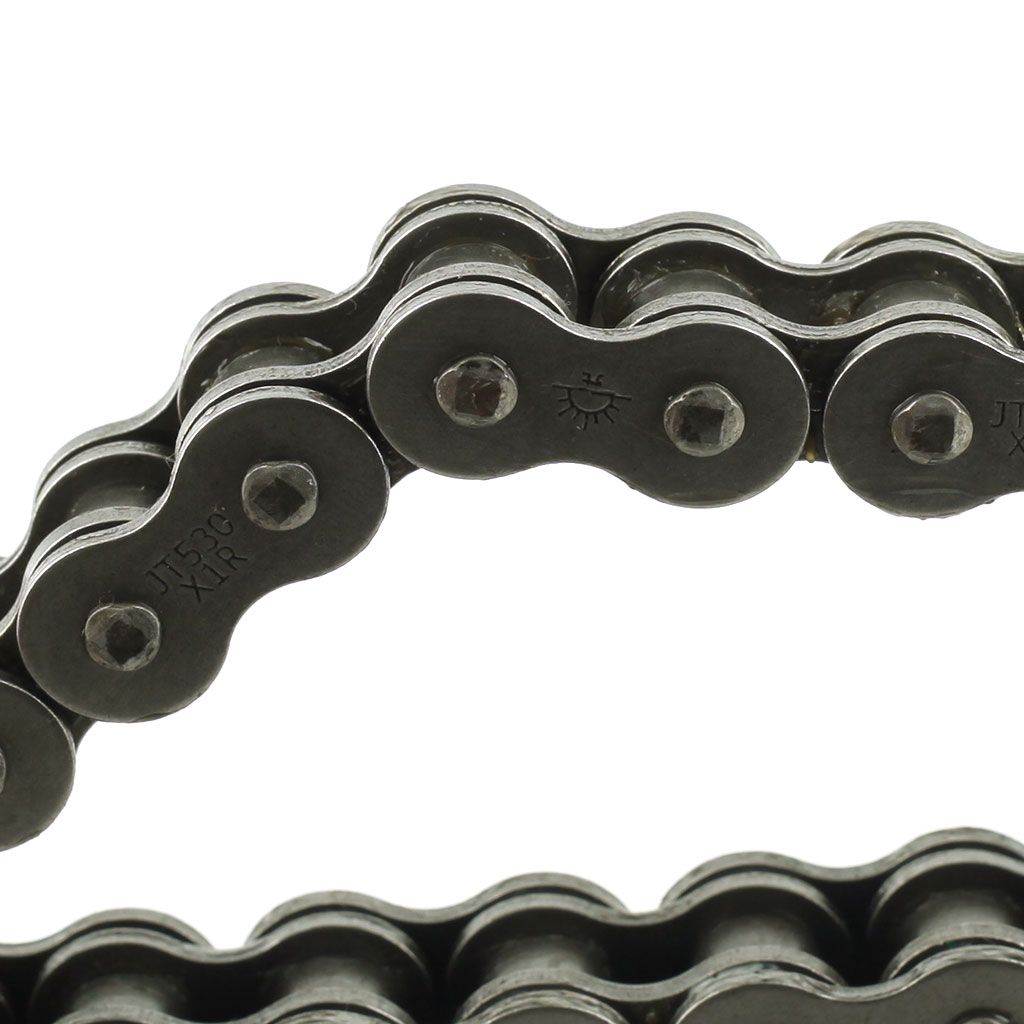
The O ring in modern motorcycle chains protect the chain from moisture and dirt – both of which contribute to rapid chain wear.
The O-Ring style chains now come with a variety of different shaped O-Rings to provide more protection – The following pictures from RK Excel shows the different shape O-Rings used in chains today – the X and W profile O-Rings trap lubricating grease and help provide protection.

However, here are some small disadvantages of the O-Ring chains…
1. The total width of the chain is greater than non-O ring chain – the presence of the O rings spaces out the side plates and requires longer pins – this adds to the weight of the chain and can require spacers to ensure the wider chain clears the engine cases. With a select few models (CB350F, CB500F and CB550F), you cannot use an O-ring chain due to the chain rubbing the transmission cover.
2. The O rings create a small amount of drag on the chain that results in a minor performance loss at the rear wheel. The big advantage of the O ring chain is the greatly improved life of the chain – often doubling or tripling the life of the chain and sprockets over an equivalent non-O ring chain and sprockets. You do still need to use a chain lubricant on the chain. Match the chain lube to the type of chain.
Chain has different tensile rating – this strength rating shows how much force it would take to pull a chain apart – the higher the tensile rating, the stronger the chain.
Motorcycle chain uses an alternating over/under link pattern. Because of this, chain is always sold in even numbers of links.
NOTE: Avoid putting non-motorcycle (industrial) chain on motorcycles, these chains are NOT designed for running at speed and enduring the harsh stresses put on them by a motorcycle.
Why change to 530 chain?
There are several reasons…
1. Cost savings – the 530 chain tends to work out about $10-$15 cheaper.
2. Weight saving – this is less mass the engine has to drive – and this is tied directly with HP to the rear wheel.
3. Color and O-ring variety. There are multiple colors of 530 chain, and more variety of O Ring types.
In converting, it is easy to calculate the 530 sprocket sizes (see below) – but then you need to match against the availability of sprockets. If you want custom sprockets, just about any size rear sprocket can be made in aluminum – the caution here is cost and wait time – depending on the time of year, you can wait 3-4 weeks for a custom sprocket, and may pay $30-$50 (or more) over the cost of a steel sprocket.
630 chain is 3/4″ pitch (or think of it as 6/8″), 530 chain is 5/8″ pitch – so the simple conversion in teeth is to divide the 630 sprocket teeth count by 5 and multiply by 6.
530 to 520 conversions don’t change the tooth counts, just the width of the chain and sprockets.
• 630 15 tooth front becomes a 530 18 tooth sprocket.
• 630 35 tooth rear becomes a 530 42 tooth sprocket.
• 92 link rear chain becomes 110.4 links (rounded to 110).
The sprockets are the same diameter as before, just with more (but smaller) teeth.
Often you end up with fractions of teeth – these you must round up or down – the key here is to calculate a ratio close to the ratio you require…


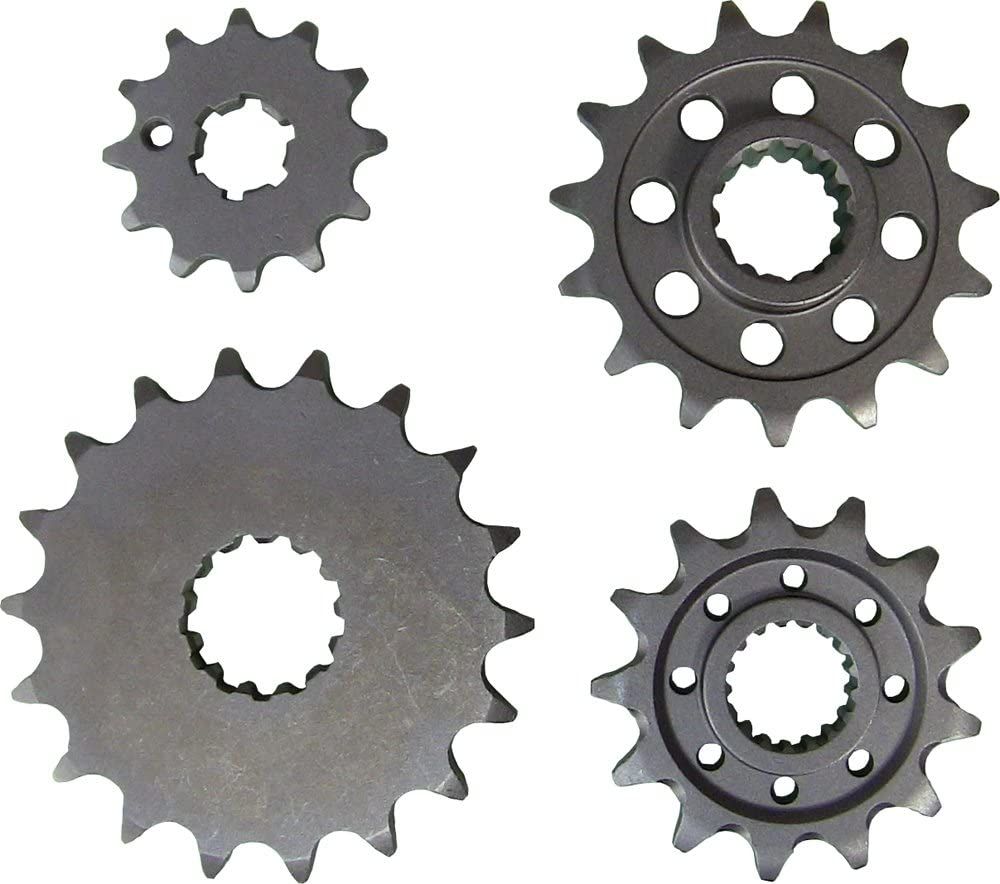
To be able to easily convert from 630 to 530, you must find sprockets with the same mount attributes:
• Rear sprockets that have the same center size and bolt spacing. The following two sprockets have the same 80mm hole spacing, bolt centers 104mm apart, and bolt holes 10.5mm in diameter.
• Front sprockets, the center spline size, and teeth count must match to be able to swap the sprockets – the Z=13 shows the spline count, and the 25mm & 21.6mm show the diameter and depth of the teeth. Lastly, if there are any offsets or raised bosses on the front sprocket, you must look for the same on the conversion sprocket or adjust with spacer washers if the spline
allows.


Sprocket spacing is important too – on the two front sprockets above, you will see the 630 version has a boss (raised area) to the inside – to be able to switch to the 530-equivalent sprocket, spacers must be added to give enough clearance between the chain and the engine cases. We sell 1.5mm & 6mm spacers.
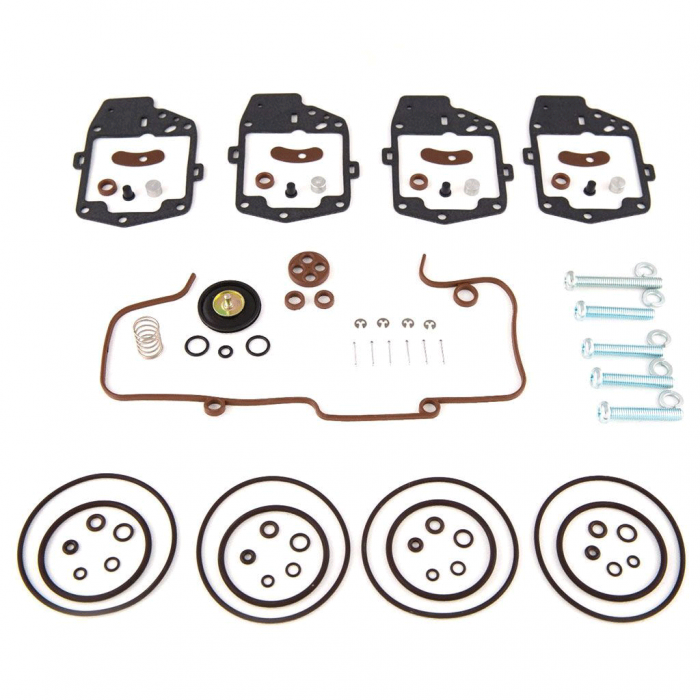
This kit is proprietary to Randakks…you won’t find this available anywhere else at any price.
Unlike ordinary aftermarket kits, each Randakks kit provides everything listed for all 4 carbs plus other items required for splitting and rejoining the carbs to replace the cross-carb fuel transfer tubes.
Only the highest quality items are included. This kit has been thoroughly tested and represents the best value available in the market.
Trust us, you’ll need everything in this kit to do a proper overhaul of your carbs.
Continue reading “Honda GL1000 Randakk Master Carb Overhaul Kit®”
You might consider this item ..synchronization is shown: Randakk’s GL1000 Carb Rebuild Video
Proper carb synchronization is the key to a sweet running bike. When carb sync is out of whack, you can have a poor idle, poor off-idle response, “hanging” throttle and lazy return to idle. You can even suffer from fouled plugs if one or more throttle butterflies are opening early, thereby partially activating the carb’s progression circuitry. Very small adjustments will have a major impact on idle smoothness!
I was inspired to create this Tech Tip after reading an old post by Jim Myers on the Classic Wing Club mail list. The general context of the thread surrounded the issue of setting idle mixture screws.
My view – a proper carb rebuild on a vintage ‘Wing, properly MAINTAINED should be a once-and-done proposition that gives years of reliable and trouble-free service. That’s always been my personal experience!
Otherwise, if you use inferior parts or take shortcuts – you can take advice from Alec Baldwin 

You might consider this item: Randakk’s GL1000 Carb Rebuild Video
Here’s a partial list of problems encountered by amateurs when rebuilding GL1000 carbs. Often, I’m called upon to resolve botched rebuilds by incompetent mechanics, current or previous owners, brothers-in-law, and neighbors. Avoid these mistakes if you tackle a rebuild yourself.
GL1000 Carbs Restored by Randakk Customer Jouko Tomminen of of Lahti, Finland
Continue reading “Common Honda GL1000 Carburetor Rebuilding Mistakes”
Does your early GL1000 sound like a rattling bucket of bolts when idling? If so, you might have a serious engine problem but most likely you do not. Read on…

© Copyright 2026 Randakks Cycle Shakk