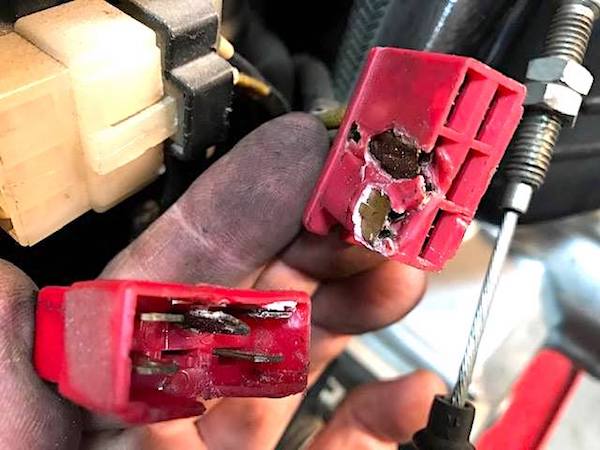
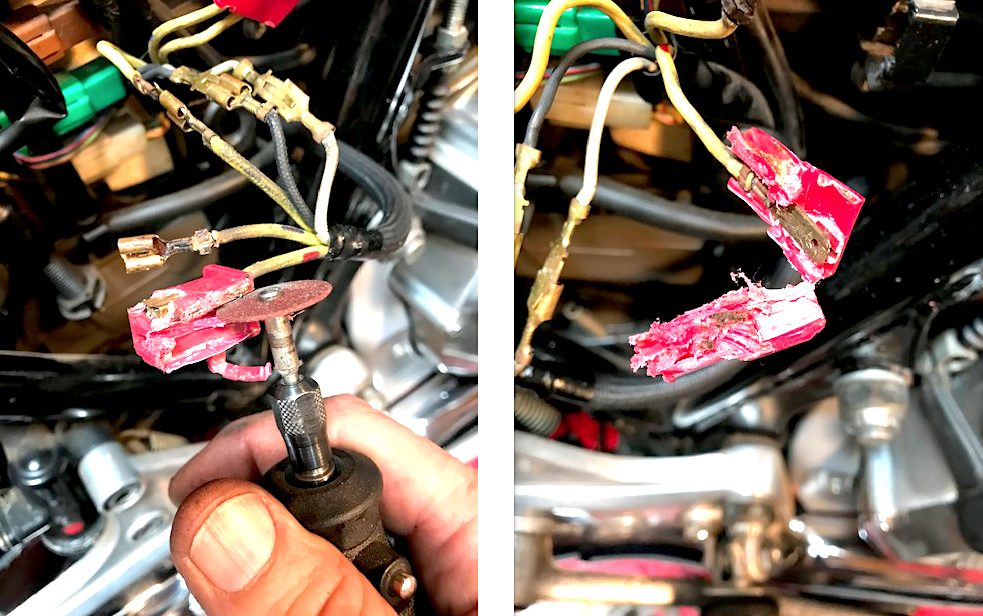
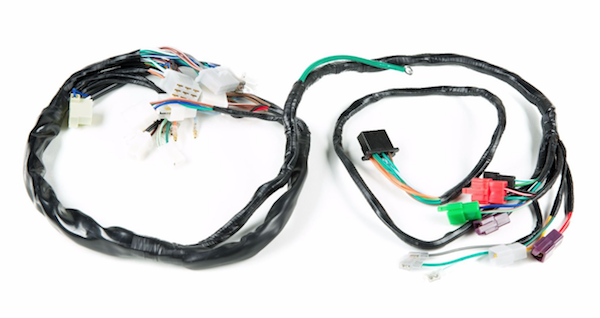
This ever happen to you? Randakk customer Randy Troy of Oceanside, CA recently faced this challenge during the resurrection of a ’79 CBX – the alternator harness plug was 100% “toast!”
Don’t worry, there’s an easy solution …and an easy prevention!
If you own a vintage Honda, you enjoy one of the best machines ever engineered. You also get to enjoy a 40 year old wiring harness! The wires in the harness last indefinitely. Not so, for the connectors and plugs. When the magic smoke disappears, your day is ruined! Often a deteriorated connector plug is the culprit.
Time and neglect inevitably lead to:
- Corrosion / oxidation
- Increased resistance
- Heat
- Melting
- Failed connectors
In the photo above, Randy found evidence for all these factors. High-load stator and alternator connectors seem to fare worst of all.
Avoid the Backyard “Fix”
You’ll see advice on forums to cut out the connector and simply solder the wires together. Don’t do it!
This will work in an emergency, but there are problems. First, the skill required for a successful high-load soldered connection is considerable. Worse, all future mechanics who come behind your work will curse you! Trust me – nothing is worse than working on a bike with a butchered wiring harness! Don’t do it.
Cure:
Best solution is to source new connectors and terminal pins from this excellent source: Vintage Connections. This reliable resource is my “go-to” expert for OEM Style Japanese Motorcycle Wiring Terminals and Connectors that correctly match factory installed components. Why “butcher” when you can do the job correctly!
Vintage Connections was founded by Del Gundlach when he found that there was a severe shortage in the market for vintage Japanese motorcycle terminals and connectors. When it came time to wire up his old Honda CB350, the parts just couldn’t be found on American shores. So he figured out the sourcing puzzle and founded a very successful business. Sound familiar?
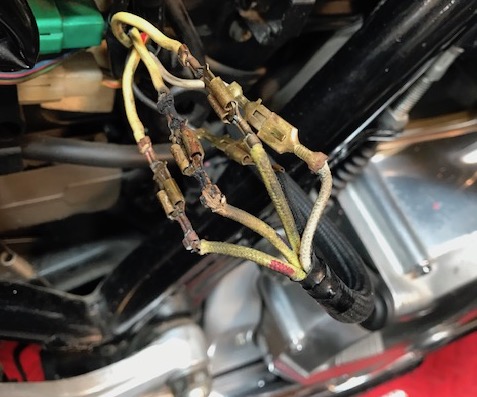
In most cases, the wires themselves are usually fine …just replacing the connector block is all you need for a no-compromise fix. The correct terminals usually come with each replacement block, so those are easy to swap out as well.
Tips:
1. Make notes / mark both sides of all wires entering the old block as necessary so they can be matched up properly. It’s helpful to snap a few photos to make sure you duplicate the factory orientation of all wires into the new block.
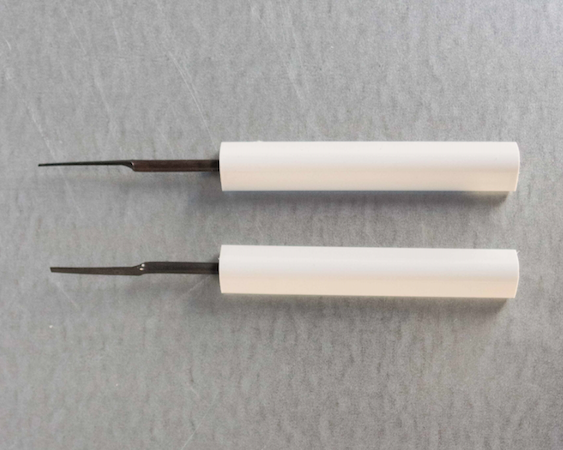
2. You’ll need an extractor tool to release the terminals from the old connector blocks. Without an extractor, you will be severely frustrated by the “one-way” terminal barbs! Vintage Connections sells a nice set in the commonly needed sizes. In a pinch, a suitably-sized micro screwdriver will also release the terminal barbs.
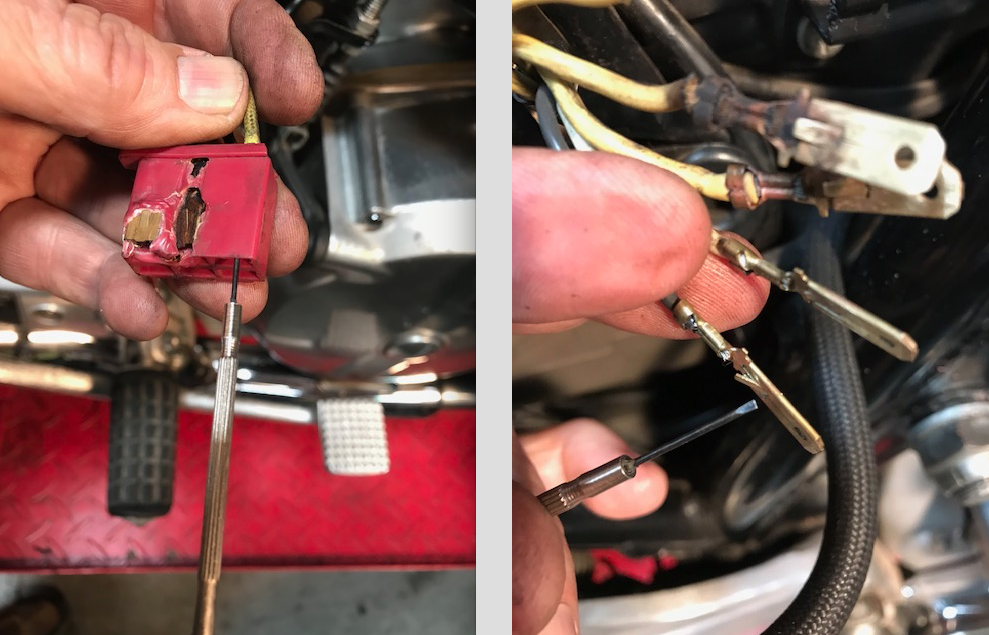
3. If the block is too far gone, you can use a Dremel cutter to disassemble the old block like this…
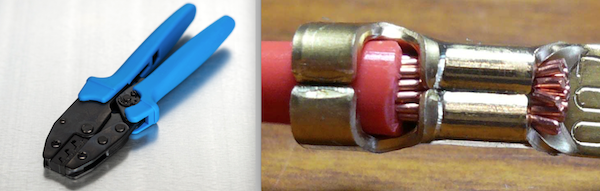
4. If the terminals need replacement, use the correct tool to make a secure double crimp. Do not use solder! Vintage Connections sells the correct tool to do a factory style double crimp. When done correctly, there should be a crimp on the bare wire + plus a stress-relief crimp on the outer insulation.
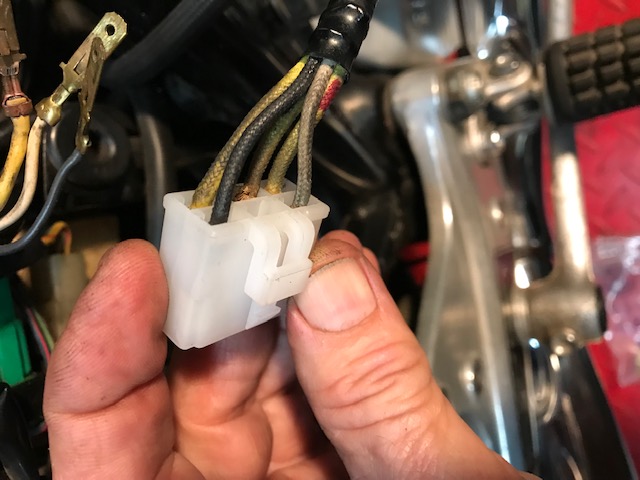
5. Simply push the terminals into the new block taking note of the “recess”for the one-way barbs.
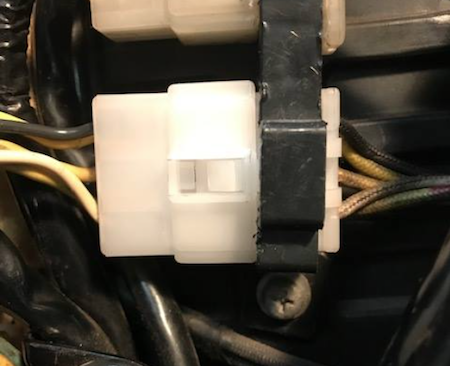
6. Add a bit of dielectric grease, then snap the male and female block halves together. Secure the block with any factory-equipped retainers. The finished result will look like this:
7. Sometimes, if there are too many problems you may have to face the inevitable. Replacing the entire wiring harness may the best option. Fortunately, excellent reproduction wiring harnesses are more available than ever.
You can find excellent reproduction wiring harnesses here:
- Wiring harnesses at: www.randakks.com
- Wiring harnesses at: www.z1enterprises.com
- Wiring harnesses at: www.mikesxs.net
- Wiring harnesses at: www.dimecitycycles.com
Prevention:
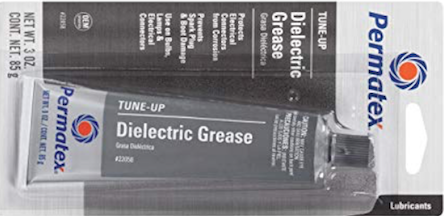
The best cure is always prevention by periodically opening the connector blocks, cleaning the terminals and applying a dielectric grease. This repels moisture and protects electrical connections against corrosion.
Important tip per ChopperCharles:
“Remember: Dielectric grease is a non-conductive insulator and should not be applied directly to the terminals. Rather, after the connector is pushed together, fill the ends where the wires enter with grease to keep dirt, dust, and water from getting in, but never apply dielectric grease directly to connections.”
Here’s what I use …available everywhere:
Residential electricians use a copper impregnated conductivity paste that some recommend for this application. That’s a good product, but I don’t recommend it because it can “travel” when hot and cause short circuits.


Can you tell me,will a 1977 gl1000 enjin fit in a 1976 frame,the only diff i see is the later enjin’s ignition sits just aboe the clutch cover behind enjin.
Thank for all the info on these bikes but I have 1 question,will any of the charging parts off a 82 gl1100 fit a 76 gl1000 thanks again
A quick look at the fiche shows they have different alternators and rectifiers. If you are curious about any other parts crossing over it is easy enough to compare the OEM numbers for each part to see if they are indeed the same. Feel free to reach out to our awesome customer service team any time.
Vintage Connections supplies an excellent product and their crimper is excellent. Well worth the investment over the K&L Supply Super Crimper which is a 2 step crimp process. I typically get my connectors from K&L simply because I buy in bulk.
Why no solder when fitting a new terminal? Just a small dab so it won’t interfere when entering the new block.
Crimped connections are superior and repeatable. That’s why manufacturers use them. Soldering can introduce excess resistance and “brittleness” that can lead to premature vibration fatigue failures. Recently, I got to examine the wiring on a Minuteman missile. Those connections were CRIMPED. The future of civilization depended on those connections. That’s sufficient testimony for me. 🙂