Standard Compression Testing:
Compression readings depend on a number of critical variables and proper testing technique.
Basics:
- Valve lash adjusted to correct spec first.
- Accurate, screw-in type, no-leak gauge (with built-in Shraeder check valve) correctly in place. Important: only one check valve should be in your entire test rig!
- Proper technique: all 4 spark plugs removed, choke “OFF” (knob “IN”) and throttle wide open.
- Strong, fully charged battery.
- Robust starter that spins at correct rpm (no drag).
- Spin each cylinder until the reading stops rising (usually 4-12 complete crank revolutions).
With all of the above in order, I routinely see 165# values and above on healthy GL1000 engines. I have seen 170# on many low mileage bikes. Values higher than 170# are uncommon and usually indicates excessive carbon build-up. Less than 150# (on my gauge) begins to concern me.
Be aware that on relatively small engines like these, the length of the hose connected to the gauge will affect the test reading. This is especially true if there is no check valve in the hose rig.
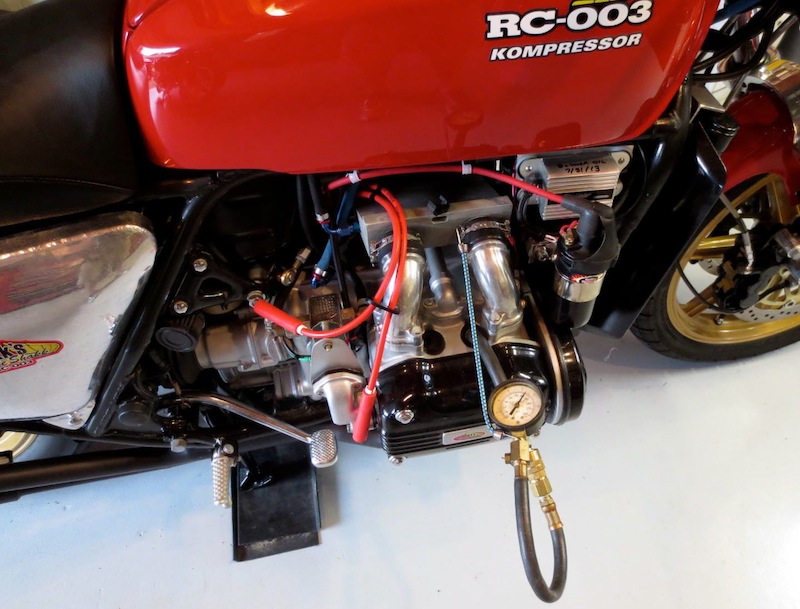
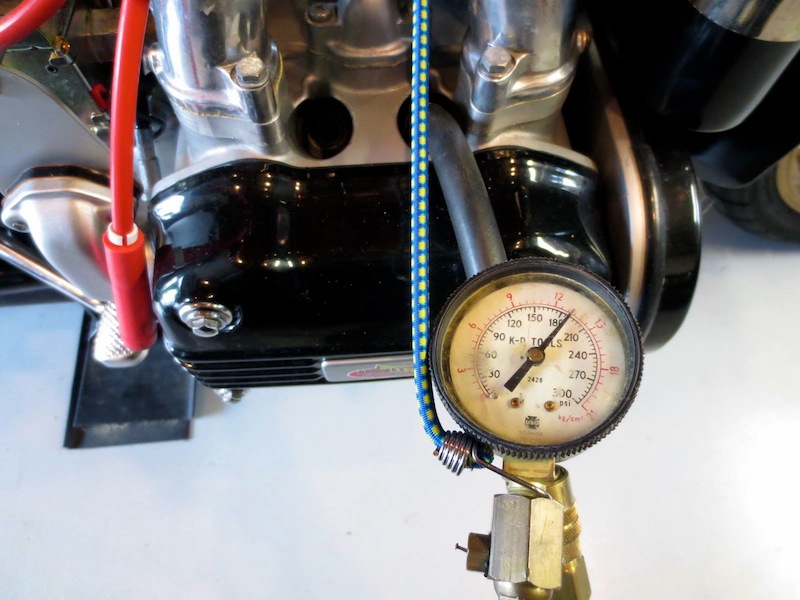
Note: the photo below shows a test reading of 186# on a healthy engine (no carbon build-up). Why? This engine on this supercharged engine has a special starter that spins 200 rpms faster than a standard starter …way faster than normal starting speed. This illustrates why you need a perfect battery and starting system to get accurate compression test results.
If values are low, you can do a “wet” test This involves squirting a small amount of oil into each cylinder, then repeating the compression testing. Be aware that on these flat “boxer” type engines, the wet test is never truly definitive. It’s difficult to get an effective oil “seal” the way you would on an upright engine. For my “wet” testing, I use an aerosol “fogging oil.” Warning: if you use too much oil, you can corrupt the test by reducing the effective cylinder volume.
If the values rise significantly with the “wet” test, this means your piston rings / cylinder bores are tired. If the values don’t change appreciably, this means your valves are not sealing properly and cylinder head re-conditioning is called for.
Keep in mind that engines that have been “sitting” for an extended period of time will usually see compression reading rise significantly in the first few hundred miles of running as the rings loosen up and carbon deposits are “processed” away. For this reason I always recommend acccumulating some miles before extensive mechanical rejuvenation is undertaken.
“Leak-down” Compression Testing:
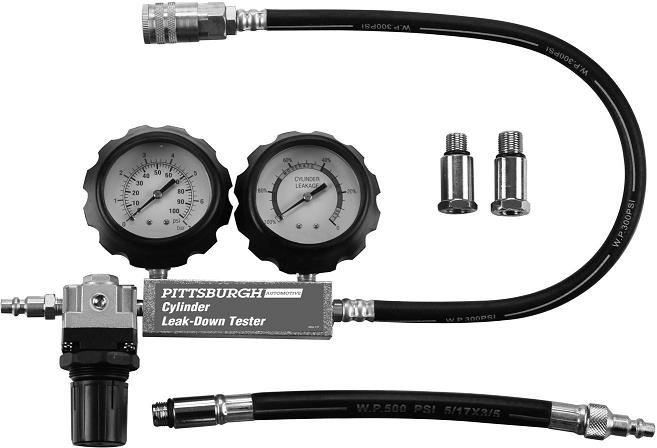
A leak-down test is a more sophisticated variant of compression testing. This involves using an air compressor to pressurize each cylinder at TDC (compression stroke…both valves closed) with a calibrated amount of presssure “in” and observing the amount of that presssure value that the cylinder is able to maintain…usually expressed in terms of pecentage leak-down.
Leak-down testers can be purchased from a variety of sources. They require a reliable source of compressed air to operate. A typical unit is shown below.
Note: precautions must be taken to prevent the engine from rotating during leak-down testing to prevent injury and keep the cylinder being tested at TDC.
Leak-down testing usually lets you “hear” the source of any compression problems:
- Escaping air in the muffler means an exhaust valve is not seating properly.
- Escaping air at the carbs indicates an intake valve problem.
- Hissing at the oil filler hole or crankcase breather means the problem is probably stuck or worn rings.
- Air sounds in the adjacent spark plug hole to the one you are testing means a blown head gasket.
Leak-down testing also permits you to make small crank rotations to help isolate actual trouble spots along the cylinder bore surfaces.
More here by Mike Nixon on leak-down testing and a method to make your own leak-down tester.
Remember: a motor than has been idle for an extended number of years will usually have lower than normal compression readings when first returned to service. Often, the values will rise after a few hundred miles of running as the rings “loosen up.”


I’m confused! The GL1000 compression ratio is 9.2:1. 9.2 x 14.7 = 135psi. Now I’ve read enough stuff, including the Honda manual to accept that these engines, when in good condition, are expected to measure around 160psi when tested. Can some one explain why this does not compute with the specified compression ratio?
gl1100 low compression all cylinders will timing belt cause this kind of problem
Thanks for a great site.
Should you compression test on a hot or cold engine?
I am perplexed. I have low compression on an 76 GL. About 120, but it runs fine. Just got back from a 5,000 mile trip on her. Poor mileage at about 32 mpg running at 55-70 mph. I replaced the timing belts when I got back and noticed that the right side, the belt that slips, was about a tooth retarded. I hand cranked it around and there was no interference, so out of curiosity I ran a compression check and as anticipated the compression dropped to around 100. So, I purposely set the belt one tooth advanced and again hand cranked for interference and all was well. Now this is the odd part. My compression went up to 130. And yes it was clearly one tooth advanced. I set it correctly after that and the bike runs well with its old 120 compression. But what is up? Why was the compression better when the valve timing was advanced from where it was supposed to be by one tooth?
thanks
That fuel mileage is acceptable. Belts should be installed EXACTLY on the marks. Compression readings are corrupted otherwise.
my comment, is a question. my used 1200 has 160 psi on 3 of 4. The other one is about 70. what is the most, to the least, likely cause of problem? valves are sealing when closed. how likely is a stuck ring that loosens up after running, to be the problem? not very, I’m afraid.
How do you know the valves are sealing?
You need to do a “wet” test to eliminate the rings, then a leak-down test. That will tell you the source of the problem.
Bikes that have been “sitting” for a long time usually loosen up with a few hundred miles of running. Here’s my method for resurrecting a “sitter”:
http://www.randakksblog.com/starting-a-gl1000-after-a-long-lay-up/