The Brilliance of the Honda CRF: Off-Road Performance Redefined


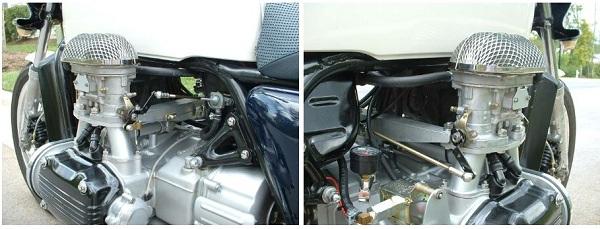
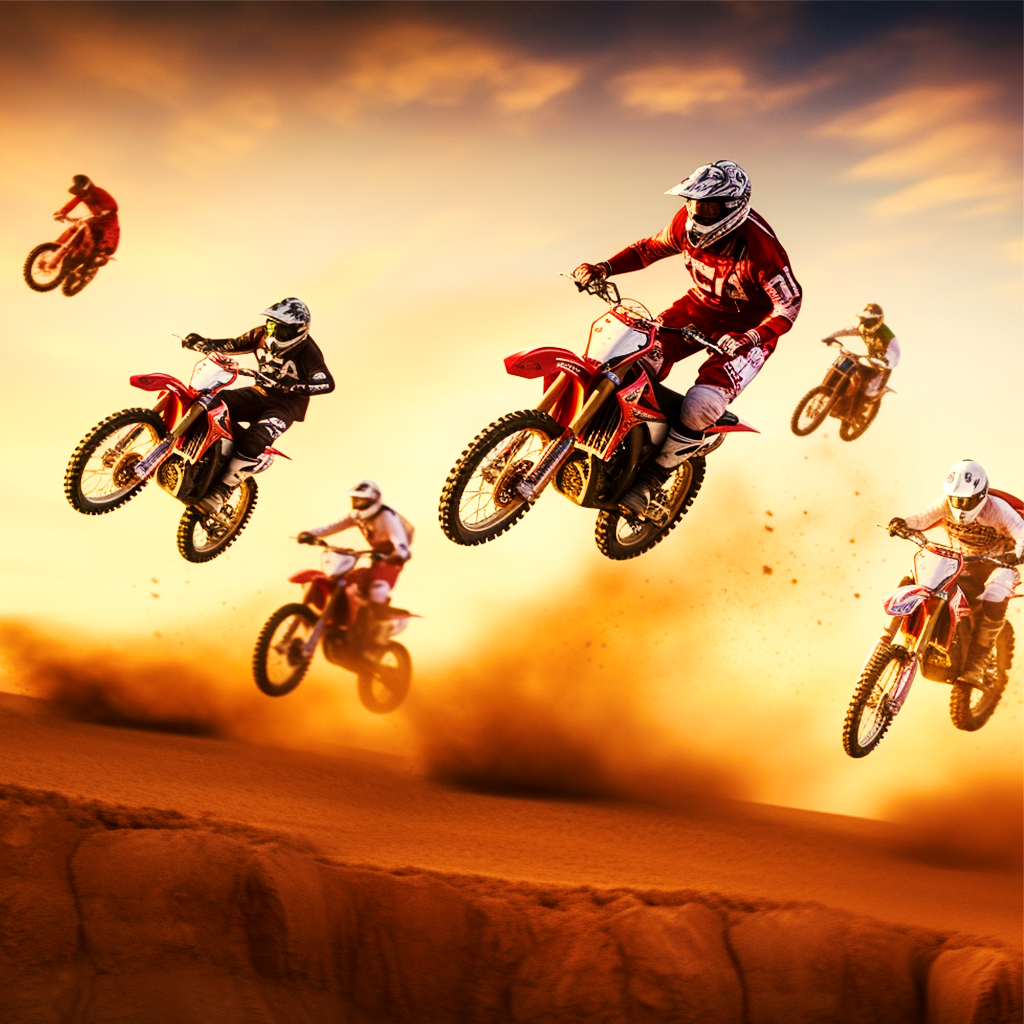
Welcome to a new world of off-road adventures brought to you by Randakks Cycle Shakk, where we explore the Honda CRF series – a marvel in the off-road motorcycle industry. As experts in the Goldwing community, we’re branching out to share insights into a range that has revolutionized off-road riding.

The Honda CRF Series: Trailblazing Excellence

Explore the Honda CRF series, a lineage celebrated for performance, innovation, and pure excitement.

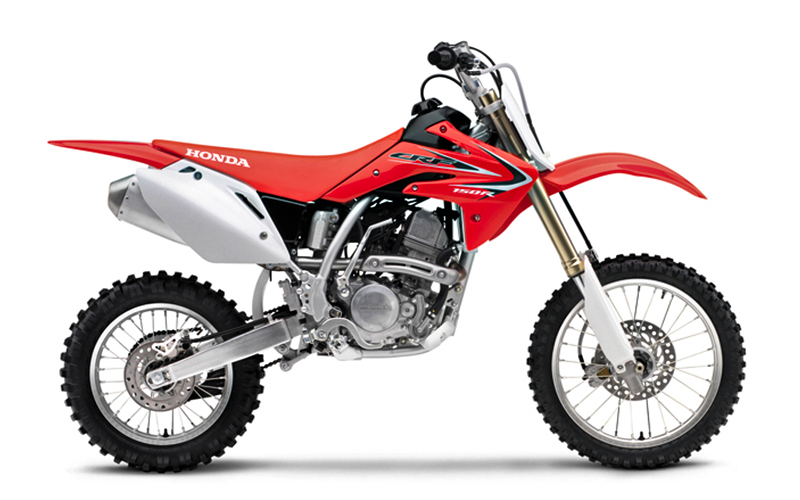
Honda CRF150R: Entry-Level Off-Road Brilliance

The Honda CRF150R is an embodiment of the passion and innovation that Honda puts into their off-road machines. Crafted to provide entry-level riders with a smooth initiation into the world of dirt biking, this bike is laden with features that make it stand out in the crowded youth segment. Let’s take an in-depth look at what makes the CRF150R a favorite among aspiring riders.

Engine: Liquid-cooled single-cylinder four-stroke

The heart of the CRF150R is its 149cc liquid-cooled, single-cylinder four-stroke engine. This configuration is designed to provide a smooth yet powerful riding experience.

  • Liquid-Cooling System: This technology ensures that the engine maintains optimal temperatures during demanding rides. The liquid-cooling not only adds to the durability of the engine but also aids in delivering consistent power output.
  • Four-Stroke Configuration: Unlike two-stroke engines commonly found in smaller bikes, the four-stroke engine offers better fuel efficiency and a more linear power curve. This makes it more manageable for younger riders while still packing enough punch to excite.

Displacement: 149cc

The 149cc displacement is a perfect middle-ground for young riders, allowing them to feel the thrill of a high-performance engine without being overwhelmed.

  • Power Output: This engine configuration provides an exciting yet manageable power range that’s appropriate for beginner and intermediate riders. It strikes a balance between being approachable for new riders and offering room to grow.
  • Efficiency and Performance: Honda’s engineering ensures that the 149cc engine delivers a responsive and lively ride without compromising on fuel efficiency.

Chassis and Suspension

The Honda CRF150R is not just about the engine; its chassis and suspension are designed for top-notch handling and comfort.

  • Lightweight Frame: The bike’s frame is crafted to offer a robust yet lightweight structure, enhancing the bike’s agility and responsiveness.
  • Advanced Suspension System: The front and rear suspension systems offer versatile adjustability, ensuring optimal performance across diverse terrains and catering to individual rider preferences.
  • Braking System: Equipped with disc brakes on both the front and rear, the CRF150R offers excellent stopping power, boosting rider confidence.

Honda CRF250 Series: Power and Versatility on Trails

The Honda CRF250 Series is a testament to Honda’s dedication to excellence in the world of off-road biking. Comprising models like the CRF250R, CRF250X, and CRF250L, this series offers a versatile range of off-road bikes tailored for racing, trail riding, and even dual-sport use. Let’s explore the intricacies of the CRF250 Series that make it an outstanding choice for riders seeking power, agility, and adaptability.

Engine: Liquid-cooled single-cylinder four-stroke

The liquid-cooled, single-cylinder, four-stroke engine is the foundation of the CRF250 series, providing a high-revving and responsive performance across the range.

  • Liquid-Cooling System: Designed to maintain consistent engine temperatures, the liquid-cooling system contributes to a sustained power output, even under extreme riding conditions. It ensures the longevity of engine components and provides reliability.
  • Four-Stroke Design: The four-stroke configuration emphasizes torque and control, lending to a more tractable power delivery that suits various riding styles and terrains.

Displacement: 249cc

The 249cc displacement of the engine in the CRF250 Series offers riders a thrilling and potent ride.

  • Power and Efficiency: A 249cc engine packs a strong punch in terms of power but remains efficient and rider-friendly. It provides the energy for aggressive trail riding and racing, yet can be harnessed comfortably by riders with different skill levels.
  • Versatility Across Models: This displacement works across different models in the series, enabling a uniform yet distinct experience for riders whether they choose the CRF250R for racing, the CRF250X for trails, or the CRF250L for dual-sport purposes.

Distinct Models: CRF250R, CRF250X, CRF250L

Each model in the series caters to unique riding needs, yet they all share the core of the CRF250 philosophy.

CRF250R: The Racer’s Choice

  • Performance-Oriented: Designed with motocross racing in mind, the CRF250R offers aggressive tuning, a performance exhaust system, and a lightweight chassis.
  • High-Revving Engine: The engine’s ability to rev high complements the racing DNA of this bike, offering thrilling acceleration and sharp responses.

CRF250X: Tailored for Trails

  • Trail-Ready Suspension: The CRF250X comes with a softer suspension setup that provides comfort and control on rugged trails.
  • Versatile Power Delivery: Its engine is tuned for a broader torque spread, providing power when needed, without sacrificing the ability to traverse challenging terrain.

CRF250L: Dual-Sport Capability

  • Street and Trail Balanced: The CRF250L bridges the gap between on-road commuting and off-road adventure, with a balanced engine tune, comfortable ergonomics, and necessary street-legal features.
  • Adventure Ready: It’s a bike that can take on city streets and country trails with equal poise, emphasizing Honda’s commitment to versatility.

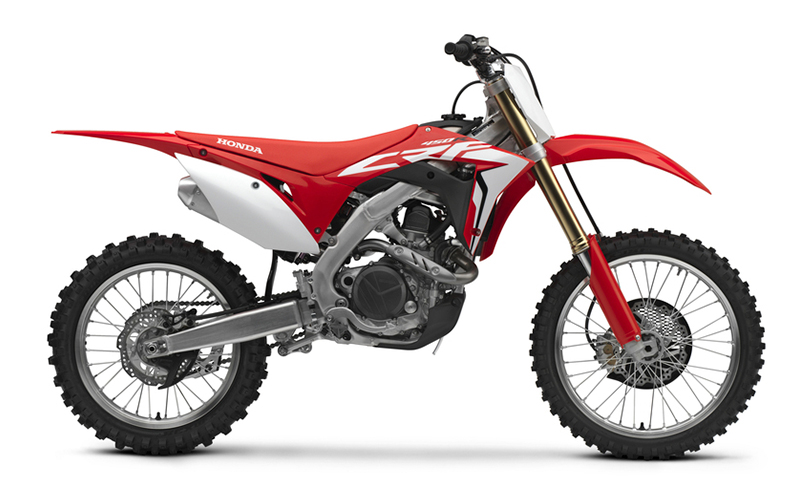
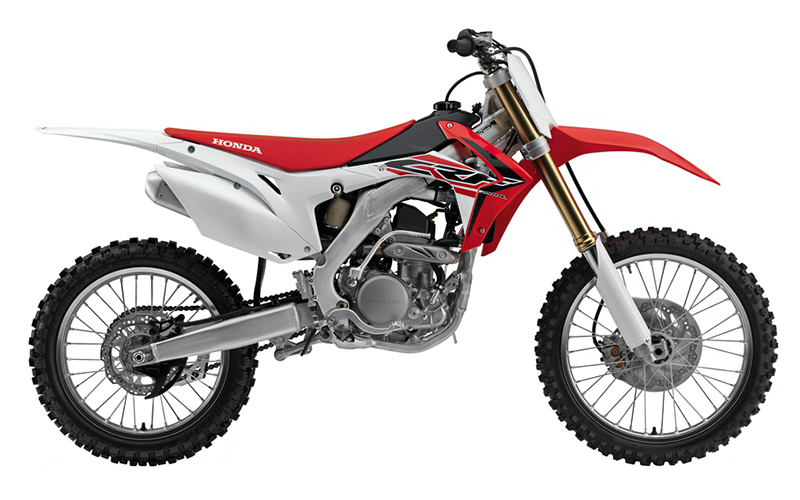
Honda CRF450 Series: Dominance in Off-Road Racing

The Honda CRF450 Series stands as a symbol of off-road excellence, bringing together raw power, precision engineering, and innovative design. Comprising models like the CRF450R, CRF450X, and CRF450L, this series has become a go-to choice for professional riders and enthusiasts alike, each model catering to specific off-road biking needs. Here’s an in-depth exploration of the features and performance characteristics that make the CRF450 Series a dominant force in the off-road racing world.

Engine: Liquid-cooled single-cylinder four-stroke

The CRF450’s engine is a remarkable feat of engineering that sets the tone for the bike’s performance across all terrains.

  • Liquid-Cooling System: Essential for maintaining optimal engine temperature during high-intensity rides, the liquid-cooling system ensures consistent performance while mitigating wear and tear.
  • Four-Stroke Configuration: The four-stroke engine delivers a steady flow of power, producing an effective torque curve that makes handling more predictable and engaging.

Displacement: 449cc

At 449cc, the engine displacement offers an incredible blend of power and agility, suitable for both competitive racing and recreational off-roading.

  • High Power Output: With 449cc, the CRF450 series boasts an engine that has a thrilling output, capable of propelling riders to remarkable speeds and conquering demanding terrains.
  • Performance Tuning Options: This displacement allows riders to fine-tune the engine’s performance to suit individual riding styles and track or trail requirements.

Distinguished Models: CRF450R, CRF450X, CRF450L

Each model in the series has been carefully engineered to meet specific demands and preferences of different off-road riding disciplines.

CRF450R: The Racing Behemoth

  • Track-Focused Design: With sharp handling, lightweight construction, and aggressive power delivery, the CRF450R is crafted for competitive racing.
  • Advanced Suspension System: A competition-oriented suspension setup enhances the CRF450R’s agility and responsiveness on the race track.

CRF450X: The Trail Master

  • Versatile Performance: The CRF450X is designed to tackle everything from tight trails to open desert terrains, offering a balanced engine character and suspension tuning.
  • Robust Construction: Built to endure, the CRF450X boasts a rugged frame and durable components, making it a reliable partner for long trail rides.

CRF450L: Dual-Sport Excellence

  • On-Road and Off-Road Capability: Bridging the gap between trail and tarmac, the CRF450L provides a blend of off-road prowess and on-road legality.
  • Adventurous Design: With features that cater to long-haul exploration, the CRF450L is a trustworthy companion for those who seek adventure beyond the traditional off-road paths.

At Randakks Cycle Shakk, our recognition for quality and innovation extends far beyond our esteemed Goldwing parts and accessories. The Honda CRF series stands as a testament to dedication, engineering prowess, and the unbridled passion that fuels the heart of every motorcycling enthusiast.

With the CRF series, riders of all levels find a gateway to exploration, excitement, and excellence. From the entry-level off-road brilliance of the CRF150R to the adventurous trails with the CRF250 and CRF450 series, Honda’s lineup embodies a diverse and thrilling world of off-road biking.

Whether you’re seeking raw power, versatile performance, or environmentally responsible riding, the Honda CRF series offers a spectrum of choices tailored to your unique passion and pursuits. Our commitment at Randakks Cycle Shakk is to not only provide parts but to also engage, inspire, and support your journey.

Join us at Randakks Cycle Shakk to delve deeper into the Honda CRF models, explore the exhilarating world of off-road racing, or embark on unforgettable motorcycle adventures. Together, we celebrate the spirit of innovation, adventure, and the timeless joy of riding that Honda’s CRF series brings to life. Come experience the future of biking, grounded in tradition and propelled by excellence. Your trail awaits.

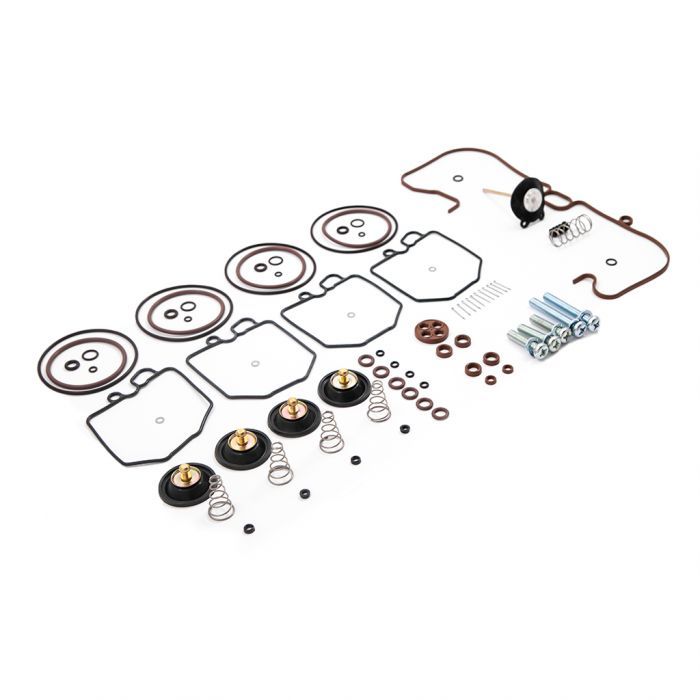
SELECT YOUR CRF MODEL TO SEARCH FOR PARTS ON RANDAKKS

This blog post is brought to you by Randakks Cycle Shakk, a hub for Goldwing enthusiasts and anyone passionate about motorcycles. Stay tuned for more insights into the world of two-wheeled wonders, and as always, ride with pride.

SHOP HONDA CRF80 PARTS HERE

SHOP HONDA CRF100 PARTS HERE

SHOP HONDA CRF150 PARTS HERE

SHOP HONDA CRF230 PARTS HERE

SHOP HONDA CRF250 PARTS HERE

SHOP HONDA CRF450 PARTS HERE

All Balls Wheel Bearing Technical Documentation

1. Bearing Removal

Use a long punch (should have a good edge)
Remove any Circlips or retainers. Insert the punch into the wheel and catch the edge of the bearing on the other side. Using a hammer, hit the punch and work around the entire circumference of the bearing.
The bearing and seal will eventually be pushed out of the wheel hub. The second bearing can be removed using a punch, a long socket or other suitable driver.

Note: The bearings will be damaged during the removal process and should not be reused. The hammer blows transmit their impact through the balls causing small flat spots, which will cause the bearing to
quickly fail if reused.


2. Inspection

  • Inner Spacer: Check the bore to make certain it is clean and the axle easily passes through it. Check each end for wear and burrs. The edges must be square to seat properly against the new bearings. If the old bearings failed it is a good idea to confirm that the center spacer has not been damaged. Make sure
    the inner space is the same length or slightly longer than the bearing stops in the hub or carrier.
  • Wheel Hub: Clean the hub, removing any dirt and corrosion. Make certain not to remove metal. This will adversely affect bearing fit.
    Outer Wheel Spacers: Clean the outer wheel spacers and inspect them for wear on either end as well as wear on the outer surface where it makes contact with the seal. If the spacers are excessively worn they should be replaced.


3. Bearing Installation

  • Note 1: Improper installation can cause bearing damage and dramatically reducing bearing life.
  • Note 2: Heating the wheel hub will cause the hub to expand slightly and will make
    bearing installation easier.
    Follow the simple rules below to successful bearing installation:

1. Apply pressure ONLY to the outer race of the bearing.
2. Apply pressure evenly so the bearing remains square to the wheel hub.
3. Seat the first bearing fully.
4. Remember to place the inner spacer between the bearings.
5. Tap the second bearing in until the inner race just touches the center spacer. See fig 1 Fully seating the second bearing may cause both bearings to become side-loaded causing premature failure. See fig 2   

6. If the center spacer is loose after the second bearing is installed this may be a sign that the center spacer is too short and needs to be replaced or the second bearing needs to be taped in further.

A loose or worn center spacer can cause the bearing to be side-loaded in the opposite direction after the axel is torqued down. See fig 3


Bearing Installation Diagram


How To: Install The 32-CB350RS Rearset Kit


Thank you for purchasing a set of CB350 rearsets for that custom scoot!
Your business is appreciated.

This a detailed set of general instructions to install on your CB350/CL350.
Please follow them in order, and allow for variances from year to year on these
bikes. Japanese are famous for subtle changes from one model year to another.

1. Remove passenger pegs from both sides and suspend muffler if bracket is
attached.

2. The new mounts are symmetrical in shape and can be mounted to either
side correctly.

3. Once all rearset components have been accounted for, you can begin
assembly.

4. With the mounts still OFF the bike, Place the shorter of the 3/8-16 button
head bolts through the center hole at the larger end of the mount.

5. Slide a lever over the ‘nose’ of a hinge, and bolt the hinge to the outside
(single boss side) of the mount, using the shorter of the 3/8-16 buttons, and
a split washer.

6. Make sure the end of the bolt does not Protrude into the slot machined
into the hinge. This will impede free folding of the peg when installed.

7. You will need to judge by eye, the proper angle to set the peg so it folds up,
and maybe back a little. 5-10 degrees on estimate. The radius of the hinge
goes to the top.

8. Now you can place the mount on the passenger peg mounts with the
longer 3/8 bolt to the rear, and add the 6mm button head to the front.
Make sure to add the nylon lock nut to the rear mount bolt.
Updated 02/04/2014

9. Once again, this is just for Mock-up purposes. ADD LOCTITE Or an
equivalent thread locker to ALL threads when finished.

10. Once the mounts are on the Bike, you can add the male foot peg. It will
slide in with some possible drag. Than place the pin through the pegs and
add the washer and cotter key. Make sure the peg swivels freely.

11.Toe peg is next. Simple ¼-20 flathead stainless. This one you can loctite
immediately on first install.


Linkage

1. Shifter side is pretty straight forward. The shorter linkage goes on the
shifter side. Nothing changes if you use your existing shifter turned
upwards, and drilled/tapped; or an aftermarket unit. ie… fast from the past,
ebay…etc. What is important is that the final angle of the upper arm of the
new lever, closely matches the angle of the splined shift arm you use. In
other words, If your comfort position has the lever arm pointing forward
approx. 20 degrees, you want the splined shift arm pointing forward
approx. 20 degrees.

2. Place a ball joint on both ends of the threaded rod (short piece) with a jam
nut already installed on the rod. Screw the ball joint on about half way.
Leave the jam nuts loose at this time.

3. Find a comfort zone with the lever and toe peg position. Make sure it is
good for upshifts, and downshifts. Now align the splined shifter arm
accordingly.

4. A good position for a drilled hole on the splined shifter(if you are resuing
your stock unit) is 1.875 -2.0 inches from the splined pivot. Too short, and it
will be a little harder to shift. Too long, and it will increase the distance of
throw needed for shifts. You may drill a couple holes if desired. This will
give you an option for feel.

5. Drill thru with a 5/16 drill, or letter “O” or 8mm.

6. Slide ball joint stud thru, and add jam nut. LOCTITE THIS THREAD WHEN
MOCK UP IS COMPLETED, BUT NOT THREADED ROD.

7. Brake side next. With the mount, and lever bolted into position, place a ball
joint onto each end of the threaded rod. Remove the brake arm from the
drum at the rear wheel. This will need to be rotated up to vertical or near
vertical. Some models have a notch on the splined stud coming from the
drum at the clamp pinch point. This will need to be ground off to rotate the
arm to vertical.

8. There is a jam nut on the stud end of the ball joints. On one end, add the
coupler to the stud. Screw it on about 3/8 inch. Tighten the jam nut to it.
This is the end at the lever, the coupler acts as a spacer to give clearance
around the shock. Add a bolt thru the lever and secure that end of the
linkage.

9. The other end gets attached to the brake arm with the supplied ball joint
and nut.

10.Double check travel on the brake side for engagement, and you may need
to adjust linkage to get adequate stopping power. Or change the angle of
the arm.

11.At this time, there is no provision for the brake light switch, and you may
need to adjust the angle of the drum arm at the rear wheel as well, for a
more comfortable lever angle.


How To: Change Chain & Sprockets

Different sprocket sizes – larger or smaller – what is the impact on performance?

Final drive ratio.

Divide the rear sprocket tooth count by the front tooth count and you have the final drive ratio. For example: 35 / 15 = 2.33:1

If you want to change your gearing, you can calculate the impact of the change before you purchase the new sprockets.

For example: your bike cruises at 60 mph / 4,000 rpm and has a final drive ratio of 2.33:1 – if you want more acceleration, changing a 35 tooth sprocket for a 37 tooth sprocket and leaving 15 tooth on the front changes the ratio to 2.47:1 (37 / 15 = 2.47:1). Divide your cruising RPM by 2.33 and multiply by 2.47. Using the example from above, 4,000 rpm becomes 4,240 rpm at 60 mph.  You’ll get more acceleration, but will sacrifice

Changing sprocket diameter can present problems – sprocket clearance on the front limits how big you can go, and you want to avoid going too small as the tight turn wears the chain prematurely. Additionally, you can run into problems with the chain slapping the swingarm if you go too small on front and/or rear. This is something you cannot always see when the bike is static, the combination of swing arm movement over the bumps, and acceleration or deceleration cause the chain to tag the top OR bottom of the swingarm.

Changing sprocket sizes may effect chain length. As roughly 1/2 of each sprocket has chain touching it, each tooth added to stock sizes will require approximately 1/2 link of additional chain. Increasing total teeth by one or two teeth can usually be accommodated by moving the rear axle forward slightly and keeping the stock chain length – but if you start changing sprocket sizes more than one or two teeth, you will need to increase chain length. Going up four teeth will require a chain 2 links longer.


How To: Determine Chain Type & Size

630, 530, 525 & 520 chain?

O-Ring, X-Ring, non-O-Ring?

What does it all mean?

Chain comes in a variety of pitches and widths. It is crucial to select the correct chain and sprockets for your bike.

The first number of the chain type designates the chain pitch and represents the distance between each pin in eighths (1/8) of an inch.

630 chain is 3/4″ pitch (or think of it as 6/8″), 530 chain is 5/8″ pitch, and so on – so if you are not sure what size chain you have on your bike, just measure the pin-to-pin distance.

The second two numbers show the width of the roller section of the chain in eighths of an inch – with an assumed decimal point between the numbers. 630 chain is 3/8″ wide and 525 chain is 5/16″ wide (2.5 eighths).

520  =  5/8-inch pitch, 1/4 inch wide
525  =  5/8-inch pitch, 5/16 inch wide
530  =  5/8-inch pitch, 3/8 inch wide
630  =  3/4-inch pitch, 3/8 inch wide

O-Ring vs Non-O-Ring chain

The O ring in modern motorcycle chains protect the chain from moisture and dirt – both of which contribute to rapid chain wear.
The O-Ring style chains now come with a variety of different shaped O-Rings to provide more protection – The following pictures from RK Excel shows the different shape O-Rings used in chains today – the X and W profile O-Rings trap lubricating grease and help provide protection.

Chain Type Diagram

However, here are some small disadvantages of the O-Ring chains…

1. The total width of the chain is greater than non-O ring chain – the presence of the O rings spaces out the side plates and requires longer pins – this adds to the weight of the chain and can require spacers to ensure the wider chain clears the engine cases. With a select few models (CB350F, CB500F and CB550F), you cannot use an O-ring chain due to the chain rubbing the transmission cover.

2. The O rings create a small amount of drag on the chain that results in a minor performance loss at the rear wheel. The big advantage of the O ring chain is the greatly improved life of the chain – often doubling or tripling the life of the chain and sprockets over an equivalent non-O ring chain and sprockets. You do still need to use a chain lubricant on the chain. Match the chain lube to the type of chain.

Chain has different tensile rating – this strength rating shows how much force it would take to pull a chain apart – the higher the tensile rating, the stronger the chain.

Motorcycle chain uses an alternating over/under link pattern. Because of this, chain is always sold in even numbers of links.

NOTE: Avoid putting non-motorcycle (industrial) chain on motorcycles, these chains are NOT designed for running at speed and enduring the harsh stresses put on them by a motorcycle.


How To: Convert From 630 Chain To 530 Chain

Why change to 530 chain?


There are several reasons…

1. Cost savings – the 530 chain tends to work out about $10-$15 cheaper.

2. Weight saving – this is less mass the engine has to drive – and this is tied directly with HP to the rear wheel.

3. Color and O-ring variety. There are multiple colors of 530 chain, and more variety of O Ring types.


In converting, it is easy to calculate the 530 sprocket sizes (see below) – but then you need to match against the availability of sprockets. If you want custom sprockets, just about any size rear sprocket can be made in aluminum – the caution here is cost and wait time – depending on the time of year, you can wait 3-4 weeks for a custom sprocket, and may pay $30-$50 (or more) over the cost of a steel sprocket.

630 chain is 3/4″ pitch (or think of it as 6/8″), 530 chain is 5/8″ pitch – so the simple conversion in teeth is to divide the 630 sprocket teeth count by 5 and multiply by 6.

530 to 520 conversions don’t change the tooth counts, just the width of the chain and sprockets.

• 630 15 tooth front becomes a 530 18 tooth sprocket.
• 630 35 tooth rear becomes a 530 42 tooth sprocket.
• 92 link rear chain becomes 110.4 links (rounded to 110).

The sprockets are the same diameter as before, just with more (but smaller) teeth.
Often you end up with fractions of teeth – these you must round up or down – the key here is to calculate a ratio close to the ratio you require…


Front Sprocket side view

Rear Sprocket side view


To be able to easily convert from 630 to 530, you must find sprockets with the same mount attributes:

• Rear sprockets that have the same center size and bolt spacing. The following two sprockets have the same 80mm hole spacing, bolt centers 104mm apart, and bolt holes 10.5mm in diameter.

• Front sprockets, the center spline size, and teeth count must match to be able to swap the sprockets – the Z=13 shows the spline count, and the 25mm & 21.6mm show the diameter and depth of the teeth. Lastly, if there are any offsets or raised bosses on the front sprocket, you must look for the same on the conversion sprocket or adjust with spacer washers if the spline
allows.

Sprocket spacing is important too – on the two front sprockets above, you will see the 630 version has a boss (raised area) to the inside – to be able to switch to the 530-equivalent sprocket, spacers must be added to give enough clearance between the chain and the engine cases. We sell 1.5mm & 6mm spacers.

© Copyright 2024 Randakks Cycle Shakk

Top ↑